こんにちは。
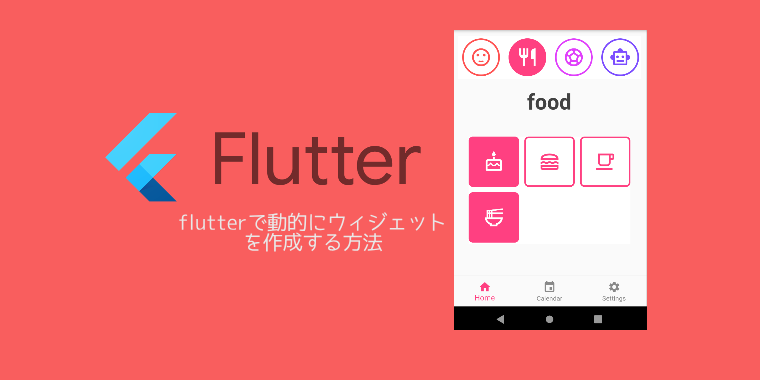
flutterで動的にウィジェットを作成する方法を説明します。他のサイトで見かけたのはボタンを押したら、リストビューにあるテキストボックスがどんどん増える、というものでした。私が今回紹介するのは、親子関係をもつアイコンを用意して、親の選択状態によって子のアイコンを切り替えるというニッチなものです。。
もしリストビューにあるテキストボックスがどんどん増えるものをお探しの場合は
コチラのサイトへお進みください。
アイコン準備
最初に色々データを準備します。
import 'package:flutter/material.dart';
import '../baseappbar.dart';

class CategoryWidget {
  String text;
  Color color;
  IconData icon;

  CategoryWidget(
      this.text,
      this.color,
      this.icon,
      );
}

class Home extends StatefulWidget {
  @override
  _SettingsState createState() => _SettingsState();
}

class _SettingsState extends State<Home> {

  List<CategoryWidget> categorylist = [];
  List<List<IconData>> allIconList = [];
  List<IconData> iconList = [];
  List<bool> isCateSelected = [];
  List<bool> isIconSelected = [];

  @override
  void initState() {
    super.initState();

    categorylist= [
      CategoryWidget('sentiment',Colors.redAccent,Icons.sentiment_satisfied),
      CategoryWidget('food',Colors.pinkAccent,Icons.restaurant_outlined),
      CategoryWidget('sports',Colors.purpleAccent,Icons.sports_soccer_outlined),
      CategoryWidget('hardware',Colors.deepPurpleAccent,Icons.smart_toy_outlined),
      CategoryWidget('vehicle',Colors.indigoAccent,Icons.directions_car_outlined),
    ];
    isCateSelected = List.generate(categorylist.length, (_) => false);
    isCateSelected[0] = true;

    allIconList = [
      [
        Icons.sentiment_satisfied_alt,
        Icons.sentiment_neutral_rounded,
        Icons.sentiment_very_dissatisfied,
        Icons.sentiment_very_dissatisfied_outlined,
        Icons.sentiment_very_satisfied_sharp,

      ],
      [
        Icons.cake_outlined,
        Icons.lunch_dining_outlined,
        Icons.local_cafe_outlined,
        Icons.ramen_dining_outlined,
      ],
      [
        Icons.sports_tennis_outlined,
        Icons.golf_course_outlined,
        Icons.sports_football_outlined,
        Icons.kayaking_outlined,
        Icons.downhill_skiing_outlined,
      ],
      [
        Icons.phone_iphone_outlined,
        Icons.computer_outlined,
        Icons.keyboard_outlined,
        Icons.headphones_outlined,
        Icons.mouse_outlined,
        Icons.watch_outlined,
      ],
      [
        Icons.directions_boat_filled_outlined,
        Icons.directions_subway_outlined,
        Icons.electric_bike_outlined,
      ],
    ];

    iconList = allIconList[0];
    isIconSelected = List.generate(allIconList[0].length, (_) => false);


  }

  @override
  Widget build(BuildContext context) {
    return Scaffold(
      appBar: BaseAppBar(
        title: Text('Home',style: TextStyle(color: Colors.black54)),
        appBar: AppBar(),
      ),
      body: categoryContent()
    );
  }
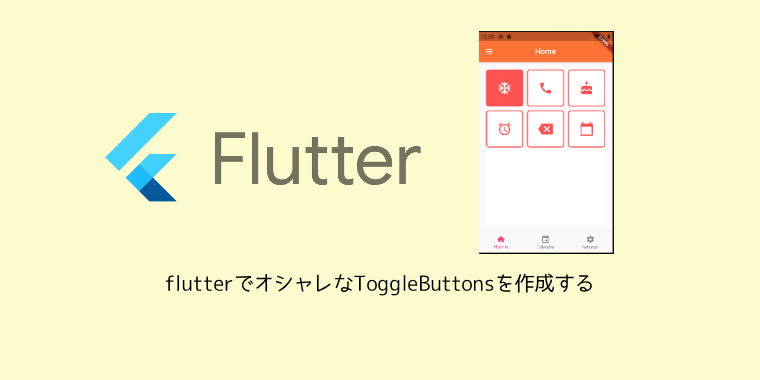
上部にある親アイコンは「categorylist」子アイコンは「allIconList」に持ちます。親と子はそれぞれListのインデックスで繋がってるものとします。親の選択状態は「isCateSelected」で管理します。ちなみに、親も子もToggleButtonsというWidgetを使用します。ToggleButtonsについては、公式マニュアルもしくは前回の記事を良かったらご覧ください。
categoryContent()部分は次の章で作成していきます。
body部分作成
上部部分はListViewで作成していきます。下部部分はGridViewで作成していきます。
int selectCategory=0;
categoryContent() {
  return Container(
    margin: EdgeInsets.only(top: 10, bottom: 10, left: 10, right: 10),
    width: double.infinity,
    child: SingleChildScrollView(
    child:Column(children: <Widget>[
      Ink(
        height: 80,
        color: Colors.white,
        child: ListView.separated(
          scrollDirection: Axis.horizontal,
          itemCount: categorylist.length,
          shrinkWrap: true,
          separatorBuilder: (BuildContext context, int index) => const Divider(),
          itemBuilder: (context, index) {
            return Container(
              padding: EdgeInsets.only(left: 8, right: 8),
              child: InkWell(
                onTap: () {
                  setState(() {
                    selectCategory = index;
                    iconList = allIconList[index];
                    isIconSelected = List.generate(allIconList[index].length, (_) => false);
                    for (int buttonIndex = 0; buttonIndex < isCateSelected.length; buttonIndex++) {
                      if (buttonIndex == index) {
                        isCateSelected[buttonIndex] = true;
                      } else {
                        isCateSelected[buttonIndex] = false;
                      }
                    }
                  });
                },
              child: Ink(
                width: 70,
                decoration: BoxDecoration(
                    color: isCateSelected[index] ? categorylist[index].color : Colors.white,
                    // borderRadius: BorderRadius.circular(35),
                    shape: BoxShape.circle,
                    border: Border.all(
                      color: categorylist[index].color,
                      width: 3,
                    )
                ),
                child: Icon(
                    categorylist[index].icon,
                  size:40,
                  color: isCateSelected[index] ? Colors.white : categorylist[index].color
                ),
              )
              ));
          }),
        ),
      Padding(
        padding: const EdgeInsets.all(20.0),
        child: Text(
            categorylist[selectCategory].text,
            style: TextStyle(
                color: Colors.grey[800],
                fontWeight: FontWeight.bold,
                fontSize: 40)
        )
      ),
      Container(
        margin: EdgeInsets.only(top: 20, bottom: 20, left: 20, right: 20),
        height: 200,
        width: double.infinity,
        child: Ink(
          color: Colors.white,
          child: GridView.count(
              primary: true,
              crossAxisCount: 3,
              mainAxisSpacing: 10,
              crossAxisSpacing: 10,
              childAspectRatio: 1,
              children:[
                ..._getIcons(),
              ]
          ),
        ),
      ),
    ]
    )
    )
  );
}
20Lで上部アイコンをonTapされたら、下部アイコンの情報iconListに設定します。isIconSelectedはトグルボタンの状態を全てfalseにしますが、保存したものを読み込むとかしないと実際には使えないですね。54LのPadding部分で上部アイコンが選択された時にそのアイコン名を表示させています。64LのContainer部分で下部アイコンを表示させます。77Lの_getIcons()でアイコンを用意します。
_getIcons()で先ほど作成したiconListでList
List<Widget> _getIcons(){
  List<Widget> iconsFieldsList = [];
  for(int index=0; index<iconList.length; index++){
    iconsFieldsList.add(
        InkWell(
            onTap: () {
              setState(() {
                isIconSelected[index] = !isIconSelected[index];
              });
            },
            child: Ink(
              decoration: BoxDecoration(
                  color: isIconSelected[index] ? categorylist[selectCategory].color : Colors.white,
                  borderRadius: BorderRadius.circular(8),
                  border: Border.all(
                    color: categorylist[selectCategory].color,
                    width: 3,
                  )
              ),
              child: Icon(iconList[index],size:40,
                  color: isIconSelected[index] ? Colors.white : categorylist[selectCategory].color),
            )
        )
    );
  }
  return iconsFieldsList;
}


コメント