こんにちは。
flutterでローカルデータベースSQLiteを使用する事にしました。FlutterでSQLiteを使うためにsqfliteというパッケージがあり、参考サイトも沢山あるのでスムーズに行くと思ったのですが、思った以上に躓きポイントが多かったので記事に残しておきます。Flutterの開発はAndoroidStudioを使用していますので、データベースの確認方法などもご紹介します。
sqfliteパッケージのインストール
sqfliteをインストールします。またAndoroid,iosで動くアプリを目指しているのでデータベースの正しい保存場所を見つける事が出来るプラグインpath_providerもインストールします。pubspec.yamlのdependencies配下に追加して、「flutter pub get」コマンドを実行します。
1
2
3
| dependencies:
sqflite: ^2.0.0+4
path_provider: ^2.0.5
|
データベースを作成
データベース用クラスのファイル「DBManager.dart」を用意して、まずはデータベースを作成していきます。
 1
 2
 3
 4
 5
 6
 7
 8
 9
10
11
12
13
14
15
16
17
18
19
20
21
22
23
24
25
26
27
28
29
30
31
32
33
34
35
36
37
38
39
40
41
42
43
44
45
46
47
48
49
50
51
52
| import 'dart:io';
import 'package:path/path.dart';
import 'package:path_provider/path_provider.dart';
import 'package:sqflite/sqflite.dart';
import 'package:sqflite/sqlite_api.dart';
class DBManager {
// シングルトンクラス
DBManager._privateConstructor();
static final DBManager instance = DBManager._privateConstructor();
//データベースの作成
static Database? _database;
static Future<Database> get database async {
if (_database != null)
return _database!;
Directory appDocDir = await getApplicationDocumentsDirectory();
var path = join(appDocDir.path, 'database.db');
var exists = await databaseExists(path);
_database = await openDatabase(
path,
onCreate: _onCreate,
version: 1,
);
return _database!;
}
static Future _onCreate(Database db, int version) async {
await db.execute('''
CREATE TABLE IF NOT EXISTS Category (
id INTEGER,
title TEXT,
subtitle TEXT,
color INTEGER,
icon INTEGER
)
''');
await db.execute('''
CREATE TABLE IF NOT EXISTS Condition (
id INTEGER,
title TEXT,
icon INTEGER,
category_id INTEGER
)
''');
}
|
参考にしたサイトは1テーブルの作成方法しか載っていなかったので、ここでは2テーブルを作成する例を挙げました。複数テーブルを作成する場合は「await db.execute(…);」を続けて書く事で作成できます。ただし一度データベースを作成した後に、「await db.execute(…);」をしても有効にはなりませんでした。その場合は「openDatabase」の前に「deleteDatabase(path);」を入れて一度データベース自体を削除する事で対応しましたが、運用後にはこの方法は使えないので、データを退避して入れなおす必要が出てきそうです。
ところでこのデータベースは一体どこに出来るのでしょうか。AndroidStudioのエミュレータを使った場合は以下に作成されました。 /data/user/0/com.example.XXXXX/app_flutter/database.db
この場所をAndroidStudioで確認するには
\[表示\]-
\[ツール・ウィンドウ\]-
\[デバイスファイルエクスプローラー\]にて確認できます。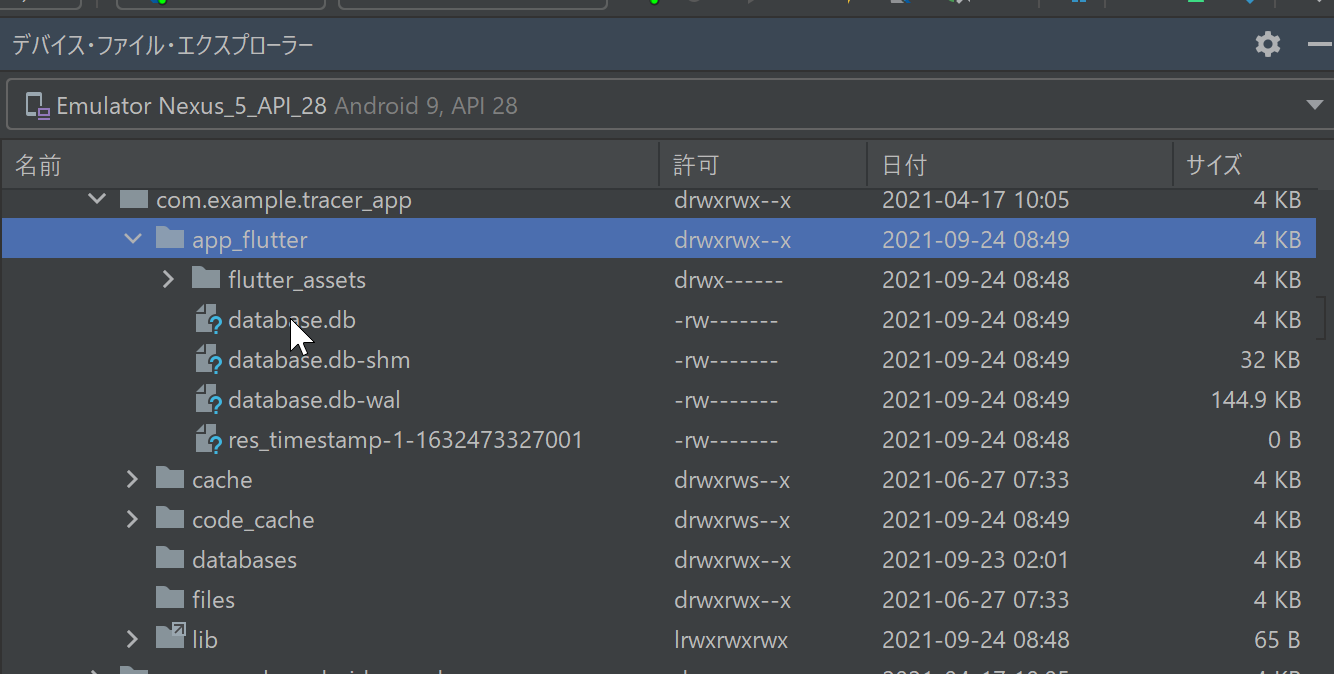
モデルクラスの作成
先ほど、「Category」「Condition」という2つのテーブルを作成しましたので、モデルクラスもそれぞれ作成します。
 1
 2
 3
 4
 5
 6
 7
 8
 9
10
11
12
13
14
15
16
17
18
19
20
21
22
23
24
25
26
27
28
29
30
31
32
33
34
35
36
37
38
39
| import 'package:flutter/material.dart';
class Category {
late int id;
late String title;
late String subtitle;
late Color color;
late IconData icon;
Category(
this.id,
this.title,
this.subtitle,
this.color,
this.icon,
);
Category.fromMap(Map<String, dynamic> map)
: id = map['id'],
title = map['title'],
subtitle = map['subtitle'],
color = Color(int.parse(map['color'].toString())),
icon = IconData(int.parse(map['icon'].toString()), fontFamily: 'MaterialIcons');
Map<String, dynamic> toMap() {
var map = Map<String, dynamic>();
map['id'] = id;
map['title'] = title;
map['subtitle'] = subtitle;
map['color'] = color.value;
map['icon'] = icon.codePoint;
return map;
}
@override
String toString() {
return 'Category{id: $id, title: $title}';
}
}
|
「Category」クラスにはデータベースには持てないColor、IconData型があるので、toMap(テーブルにデータを入れる時に)でintでデータを渡します。またfromMap(テーブルからデータを取り出す時に)でそれぞれColor、IconData型に変換しています。「Condition」に関してもほぼ同じです。
 1
 2
 3
 4
 5
 6
 7
 8
 9
10
11
12
13
14
15
16
17
18
19
20
21
22
23
24
25
26
27
28
29
30
31
32
33
34
35
36
| import 'package:flutter/material.dart';
class Condition {
late int id;
late String title;
late IconData icon;
late int category_id;
Condition(
this.id,
this.title,
this.icon,
this.category_id,
);
Condition.fromMap(Map<String, dynamic> map)
: id = map['id'],
title = map['title'],
icon = IconData(int.parse(map['icon'].toString()), fontFamily: 'MaterialIcons'),
category_id = map['category_id'];
Map<String, dynamic> toMap() {
var map = Map<String, dynamic>();
map['id'] = id;
map['title'] = title;
map['icon'] = icon.codePoint;
map['category_id'] = category_id;
return map;
}
@override
String toString() {
return 'Condition{id: $id, title: $title}';
}
}
|
データ挿入と取得
DBManagerクラスにデータ挿入・取得用関数を用意します。データが無ければ初期データを入れるようにしています。
 1
 2
 3
 4
 5
 6
 7
 8
 9
10
11
12
13
14
15
16
17
18
19
20
21
22
23
24
25
26
27
28
29
30
31
| static Future<List<Category>> getCategories() async {
List<Category> list= [
Category(0,'sentiment','sentiment subtitle',Colors.redAccent,Icons.sentiment_satisfied),
Category(1,'food','food',Colors.pinkAccent,Icons.restaurant_outlined),
Category(2,'sports','sports',Colors.purpleAccent,Icons.sports_soccer_outlined),
Category(3,'hardware','hardware',Colors.deepPurpleAccent,Icons.smart_toy_outlined),
Category(4,'vehicle','vehicle',Colors.indigoAccent,Icons.directions_car_outlined),
];
final Database db = await database;
List<Map<String, dynamic>> maps = await db.query('Category');
if (maps.isNotEmpty) {
return maps.map((map) => Category.fromMap(map)).toList();
} else{
print("Category is Empty");
for (int i = 0; i < list.length; i++) {
await addCategory(list[i]);
}
}
return list;
}
static Future<int> addCategory(Category category) async {
final Database db = await database;
return db.insert(
'Category',
category.toMap(),
conflictAlgorithm: ConflictAlgorithm.replace,
);
}
|
データベースはAndroidStudioでは
\[表示\]-
\[ツール・ウィンドウ\]-
\[Database Inspector\]にて確認できます。上記で入れたデータも確認できます。 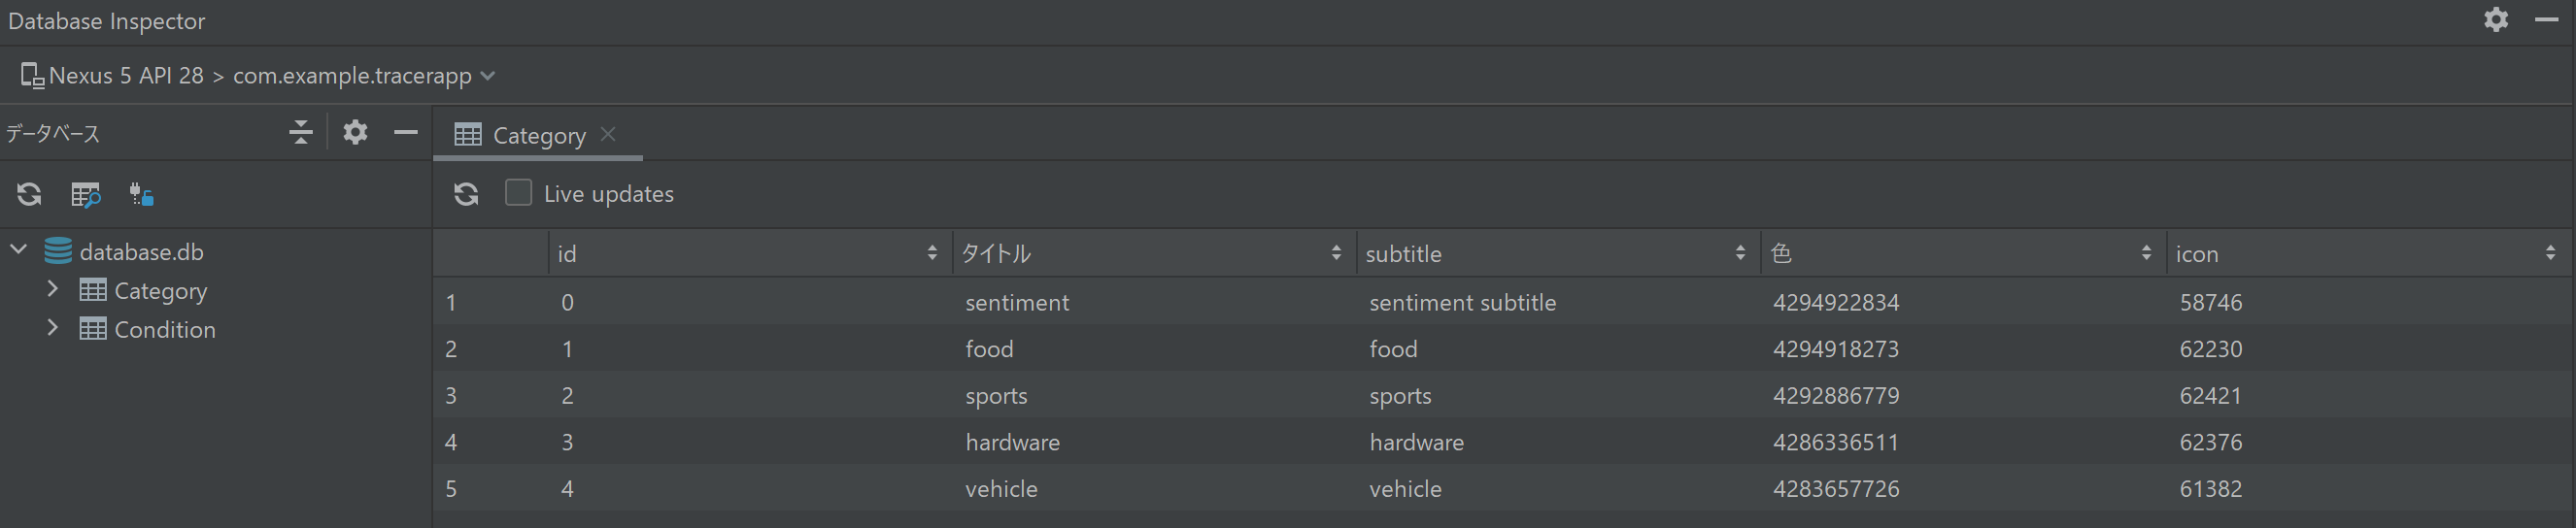
データベースの使い方
上記を呼び出す方法を記載します。DBManagerクラスに定義したものはFutureで非同期処理にしてあるため、データベースからデータ取得した後に画面表示させるにはコツが要ります。以下にあるように「FutureBuilder」を使用して非同期処理であるデータベース取得処理を待ってから画面表示するようにします。コツは「future: _future」で_futureをinitStateで1回だけ設定するようにしてあげる必要があります。「future: initCategory()」にすると、onTapイベントの度にreloadされてしまうという謎現象に悩まされていました。この解決方法はhttps://github.com/flutter/flutter/issues/11426を参考にしています。
 1
 2
 3
 4
 5
 6
 7
 8
 9
10
11
12
13
14
15
16
17
18
19
20
21
22
23
24
25
26
27
28
29
30
31
32
| Future? _future;
List categorylist = [];
@override
void initState() {
super.initState();
_future = initCategory();
}
Future> initCategory() async {
categorylist = await Future.delayed( Duration(seconds: 1),() => DBManager.getCategories()) ;
return categorylist;
}
・・・
return Container(
margin: EdgeInsets.only(top: 10, bottom: 10, left: 10, right: 10),
width: double.infinity,
child: FutureBuilder(
future: _future,
builder: (context, snapshot) {
switch (snapshot.connectionState) {
case ConnectionState.waiting:
return Center(
child: CircularProgressIndicator(),
);
default:
if (snapshot.hasError) {
print(snapshot.error);
return Text('Error: ${snapshot.error}');
} else {
return SingleChildScrollView(
・・・
|